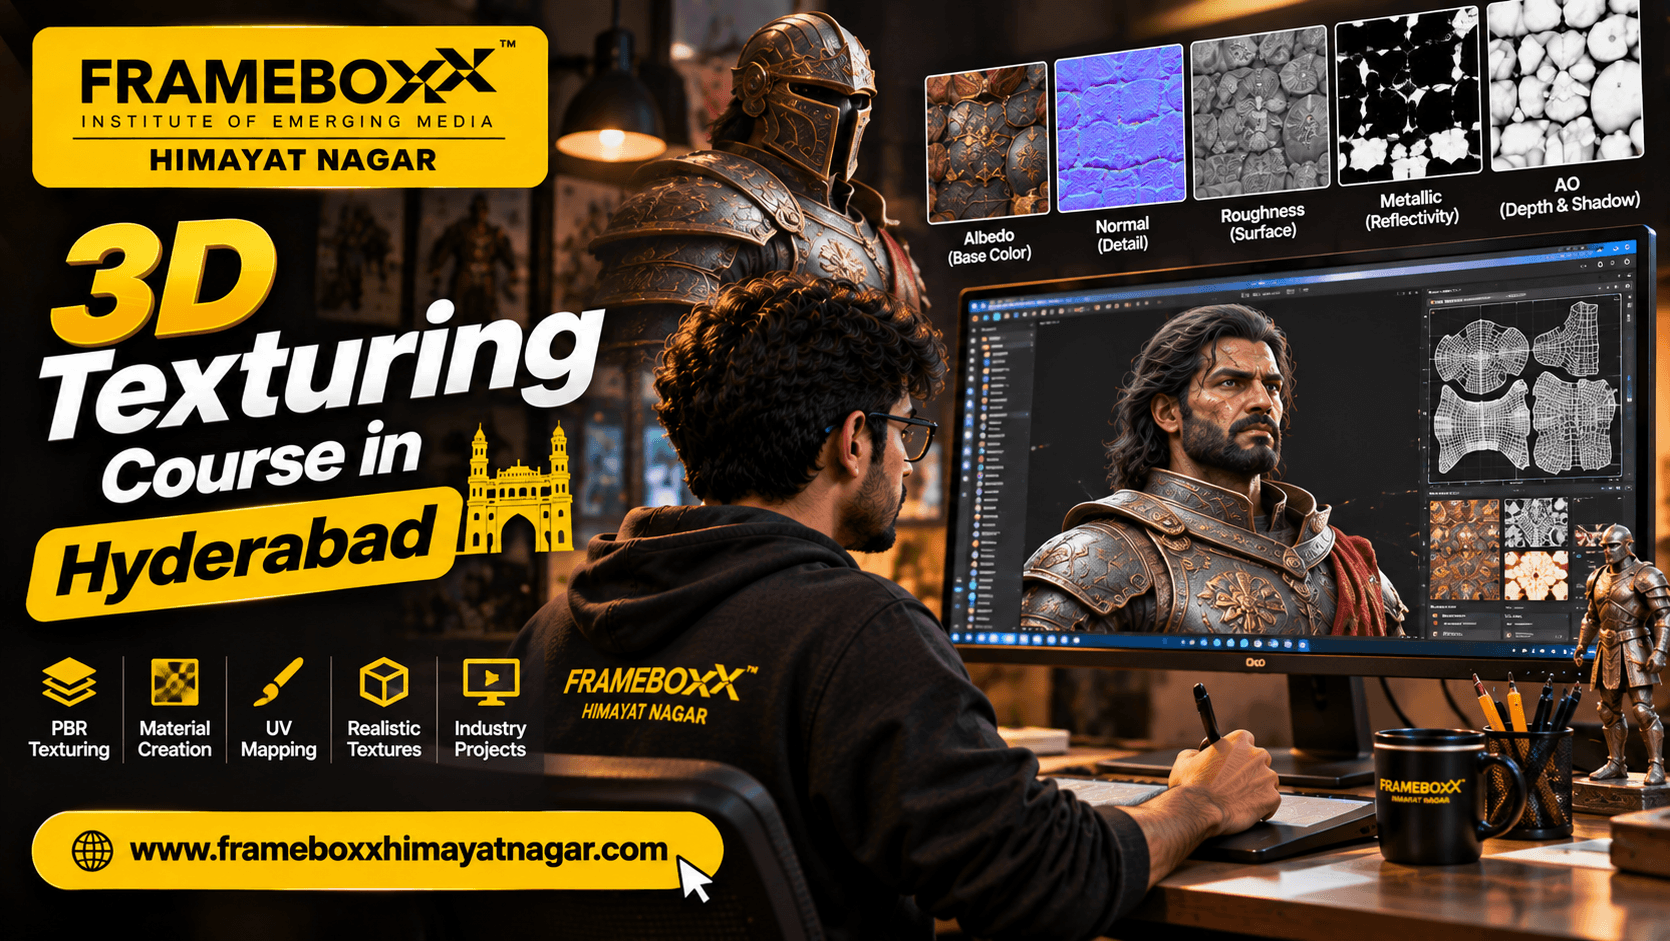
A 3D model may have the right shape and proportions, but without convincing surface details it can still look unfinished. The material, colour, roughness, reflections, scratches, fabric patterns and other surface properties help make a 3D object believable.
A 3D texturing course in Hyderabad is relevant to students who want to learn how to create and apply textures and materials to 3D models for animation, visual effects, gaming and digital production. The subject involves more than adding colour: it includes UV mapping, texture painting, material creation, physically based rendering (PBR), texture baking and checking how surfaces respond to light.
If you are considering a career in 3D art, understanding the complete texturing workflow can help you decide which skills to learn and what kind of portfolio to build.
Frameboxx Himayatnagar offers education in Animation, VFX and Digital Design. Students interested in 3D texturing can contact the centre to confirm the current programme options and whether dedicated texturing, UV mapping and material-creation training is included in the available curriculum.
What Is 3D Texturing?
3D texturing is the process of defining the surface appearance of a 3D model by applying images, colours and material properties. It helps determine whether an object looks like metal, wood, plastic, glass, stone, skin, fabric or another surface.
A 3D model without textures may appear as a plain grey object. Texturing gives its surface visual information such as:
- Base colour and patterns.
- Roughness and smoothness.
- Metallic appearance.
- Surface bumps and fine details.
- Scratches, dirt, stains and wear.
- Transparency or other material effects where supported.
For example, consider a 3D model of a metal water bottle. Modelling creates the bottle's shape. Texturing adds its painted colour, label, scratches and surface variations. Material settings determine how shiny or rough the bottle appears when light falls on it.
Texturing is therefore an important part of making 3D assets ready for animation, VFX, games and rendering.
Why Is 3D Texturing Important in Animation, VFX and Gaming?
A well-modelled asset can still look artificial if its surface does not behave convincingly. Texturing helps communicate material, age, condition and visual character.
1. Character Texturing
Character artists use textures and materials to define the appearance of skin, clothing, hair-related surfaces, accessories and other visible details.
Examples include:
- Skin colour variation.
- Fabric patterns and stitching.
- Leather jackets and shoes.
- Dirt and wear costumes.
- Surface details on armour and accessories.
A character's surface should support its design and remain visually consistent under the intended lighting conditions.
2. Environment Texturing
Environment artists texture buildings, roads, rocks, furniture, walls, vegetation-related assets and other scene elements.
For example, a city environment may contain concrete walls, painted signs, glass windows, metal railings and road surfaces. Each material needs different visual properties to make the environment convincing.
3. Prop and Asset Texturing
Props are objects used in a scene, such as tools, vehicles, furniture, weapons, machines, containers and household items.
Texturing helps distinguish materials and communicate how an object has been used. A new metal tool and a weathered metal tool may share the same model shape but require different surface treatments.
4. Game Asset Texturing
Game artists create textures for assets that must work within a real-time rendering pipeline.
They need to consider visual quality alongside texture resolution, material complexity, memory use and performance. A texture that looks good in a close-up render may need adjustments when used in a real-time game environment.
5. VFX and Film Production
In VFX, textured 3D assets may be integrated into live-action footage or computer-generated scenes. The materials need to respond appropriately to the scene's lighting, reflections and visual style.
What Is the Difference Between 3D Modelling, UV Mapping and Texturing?
These are connected stages in a 3D asset workflow, but they solve different problems.
| Process | Main purpose | Example |
|---|---|---|
| 3D modelling | Creates the shape and structure of an object | Building a 3D vehicle |
| UV mapping | Defines how a 2D texture layout corresponds to the model's surface | Unwrapping the vehicle's body into UV islands |
| Texturing | Creates the surface colours and details | Adding paint, labels, scratches and dirt |
| Shading/material creation | Defines how the surface responds to light | Making the vehicle body glossy or the tyres rough |
| Lighting | Places and controls lights in the scene | Creating reflections and shadows |
| Rendering | Produces the final image or sequence | Generating the finished vehicle shot |
A common beginner mistake is to treat UV mapping and texturing as the same task. UV mapping prepares the surface layout. Texturing creates or applies the visual information that appears on that surface.
What Is UV Mapping in 3D Texturing?
UV mapping is the process of assigning coordinates to a 3D model so that a 2D image or texture can be placed correctly on its surface.
Imagine cutting and unfolding a cardboard box. The flattened shape gives you a layout that can be painted or printed before being folded back into a box. UV mapping follows a similar idea, except the layout represents the surface of a 3D mesh.
Why Is UV Mapping Necessary?
A 3D model exists in three-dimensional space, but a conventional texture image is two-dimensional. UV coordinates establish how the 2D image corresponds to the model's surface.
Good UV preparation helps with:
- Placing textures in the correct locations.
- Reducing unwanted stretching.
- Controlling texture resolution.
- Painting details accurately.
- Managing seams between UV islands.
- Preparing assets for texture baking and export.
What Are UV Islands?
When a 3D model is unwrapped, its surface is divided into flattened sections called UV islands.
For example, a character model may have separate UV islands for the head, torso, arms, legs and other parts. The layout needs to be organised so that important areas receive sufficient texture space.
Common UV Mapping Problems
Beginners should learn to identify:
- Texture stretching.
- Overlapping UVs where overlap is not intended.
- Poor use of available texture space.
- Visible seams.
- Inconsistent texel density.
- Insufficient resolution for important details.
A strong texturing result begins with a well-prepared model and UV layout.
What Is PBR Texturing?
PBR stands for Physically Based Rendering. It is a material workflow that uses defined surface properties to produce more consistent lighting responses across supported rendering systems.
Rather than relying only on a colour image, a PBR material uses different texture maps to describe how a surface should look and respond to light.
Common PBR maps include:
| Map | What it controls | Example |
|---|---|---|
| Base Color / Albedo | The surface's colour information | Red paint on a vehicle |
| Roughness | How rough or smooth a surface appears | Matte rubber versus polished metal |
| Metallic | Whether a surface is treated as metallic in a metallic-roughness workflow | Steel versus plastic |
| Normal | Fine surface direction details that affect lighting | Small bumps or engraved details |
| Height / Displacement | Surface depth information, depending on the renderer and workflow | Raised patterns or deeper surface features |
| Ambient Occlusion | Approximate shading in areas where surfaces are close together | Darker creases and contact areas |
Not every project uses every map. The exact setup depends on the target renderer, material system and asset requirements.
Example: Creating a PBR Metal Material
Suppose you are texturing a metal storage box.
- Create or select the base colour for the painted metal.
- Set the metallic property according to the material workflow.
- Adjust roughness to control the appearance of reflections.
- Add normal details for dents, scratches or subtle surface variation.
- Use additional maps only where the asset and renderer require them.
- Preview the material under different lighting conditions.
The result should communicate the intended surface without depending on one particular lighting setup to look convincing.
How Does a 3D Texturing Workflow Work?
A professional-style texturing process involves preparation, material creation, testing and refinement. The precise steps vary according to the asset and production pipeline.
Step 1: Understand the Asset
Before creating textures, study the model and identify what it represents.
Ask:
- What materials would the real object contain?
- Which areas are painted, polished, worn or damaged?
- Where would dirt or fingerprints naturally appear?
- Which details are important in close-up shots?
- Will the asset be used in a game, animation or VFX scene?
This reference-based approach helps prevent random surface decoration.
Step 2: Check the Model
Inspect the model's geometry, normals and material assignments before beginning the texturing work.
Poorly prepared geometry can create problems during UV mapping, baking and texture painting.
Step 3: Prepare the UV Layout
Unwrap the model and organise its UV islands.
Check for distortion, unwanted overlaps, seams and inconsistent texture resolution. Give important visible areas sufficient space.
Step 4: Bake Required Mesh Maps
Depending on the workflow, baking can transfer information from one mesh representation to texture maps used during texturing.
For example, high-poly surface details may be baked onto a lower-poly model through maps such as normal, ambient occlusion, curvature or other supported mesh maps.
Baking requirements depend on the asset, software and target pipeline.
Step 5: Create the Base Materials
Set up the basic material appearance. This may include base colour, roughness and metallic properties.
At this stage, focus on making the main surface materials readable before adding small decorative details.
Step 6: Add Surface Details
Use painting, masks, layers, procedural effects or other appropriate methods to add:
- Scratches.
- Dust.
- Rust.
- Edge wear.
- Fabric patterns.
- Surface stains.
- Labels and markings.
- Fine material variations.
Details should support the object's real-world or designed use rather than being added randomly.
Step 7: Preview Under Lighting
A material should be checked under suitable lighting. A surface that looks convincing in one viewport condition may appear too glossy, too dark or too flat in another.
Review the asset from different angles and distances.
Step 8: Export and Test
Export the required texture maps using the correct format, naming conventions and material settings for the target application.
Then test the asset in the intended rendering or real-time environment. Check that the maps are connected correctly and that the material looks consistent.
Which Software Is Used for 3D Texturing?
Different applications support different parts of the texturing workflow. Students should understand what each tool does rather than assuming one application handles every task in the same way.
Adobe Substance 3D Painter
Substance 3D Painter is designed for painting and texturing 3D meshes. It supports layer-based workflows, material creation, texture painting, mesh-map baking and texture export.
It is useful for workflows involving:
- Character and prop texturing.
- Game asset materials.
- PBR texture creation.
- Surface detailing.
- Masks and layered material effects.
- Exporting texture maps for other applications.
Official documentation: Adobe Substance 3D Painter
Blender
Blender includes UV editing, material creation and Texture Paint tools. Artists can paint directly on a 3D model or work with its UV texture in the Image Editor.
It can be useful for learning the relationship between UV layouts, texture images and the visible surface of a model.
Official documentation: Blender Texture Paint
Autodesk Maya
Maya is widely used in 3D modelling and production workflows. Its UV tools and material workflows can form part of an asset preparation and texturing pipeline.
The exact role of Maya depends on the studio's software setup and the tools used for painting and rendering.
Other Tools and Applications
A production pipeline may also use image-editing applications, rendering tools, material libraries and game engines. The software combination depends on whether the final asset is intended for animation, film, VFX or real-time use.
Important: These are examples of software used in 3D workflows. They are not a confirmation that every application is included in the current Frameboxx Himayatnagar curriculum. Confirm the actual software and versions with the centre before enrolling.
Practical 3D Texturing Projects for Your Portfolio
A portfolio should show that you understand materials, UVs, surface detail and presentation. A collection of attractive renders alone may not demonstrate how the textures were created.
The following project briefs can help students practise different aspects of texturing.
Project 1: Textured Wooden Crate
Objective: Create a believable wooden storage crate.
Practise:
- Wood grain and colour variation.
- Roughness control.
- Edge wear and scratches.
- Surface dirt.
- UV layout and texture placement.
Portfolio presentation:
- Final render.
- UV layout.
- Texture maps.
- Close-up surface details.
- Material breakdown.
Project 2: Weathered Metal Prop
Objective: Texture a metal object with visible signs of use.
Practise:
- Metallic and roughness values.
- Scratches and dents.
- Edge wear.
- Rust and dirt placement.
- Surface variation.
Portfolio presentation:
- Clean and weathered versions.
- Material map breakdown.
- Close-up renders under different lighting.
Project 3: Stylised Game Asset
Objective: Create a stylised prop for a game environment.
Practise:
- Clear colour grouping.
- Controlled roughness.
- Readable surface details.
- Consistent visual style.
- Texture resolution management.
Portfolio presentation:
- Final asset.
- Turntable or multiple views.
- UV layout.
- Texture sheet.
- In-engine or target-renderer preview, if available.
Project 4: Character Clothing Material
Objective: Create surface materials for a character's clothing.
Practise:
- Fabric appearance.
- Seams and stitching.
- Colour variation.
- Roughness differences.
- Wear and folds.
Portfolio presentation:
- Close-up renders.
- Material breakdown.
- Texture maps.
- Explanation of the design decisions.
Project 5: Environment Material Set
Objective: Create a small collection of materials for an environment.
Possible materials include:
- Concrete.
- Brick.
- Painted metal.
- Wood.
- Stone.
- Glass.
Practice making the materials visually distinct and suitable for the same scene.
Portfolio presentation:
- Individual material previews.
- A combined environment render.
- Texture map examples.
- Notes on material scale and surface behaviour.
What Makes a Good 3D Texture Artist Portfolio?
A strong portfolio should demonstrate both visual quality and technical understanding.
| Portfolio element | What it demonstrates |
|---|---|
| Final asset renders | Overall surface quality and presentation |
| UV layout | Understanding of texture placement and surface preparation |
| Texture maps | Knowledge of material channels and export |
| Material breakdown | Ability to explain how a surface was constructed |
| Close-up views | Attention to fine details and texture resolution |
| Different lighting previews | Understanding of how materials respond to light |
| Project explanation | Ability to communicate workflow and decisions |
For each project, explain the asset's purpose, reference choices, UV preparation, material approach and the challenges you solved.
If the project uses a downloaded model or third-party asset, clearly identify the original creator and explain which parts of the work you completed yourself. This helps maintain transparency about your contribution.
Common 3D Texturing Mistakes Beginners Should Avoid
1. Starting Without Understanding the Material
Adding random scratches, dirt and colour changes does not automatically make a texture realistic. Study how the real material behaves and use references.
2. Ignoring UV Problems
A texture can stretch or appear distorted if the UV layout is poorly prepared. Inspect UV islands before investing time in detailed painting.
3. Using Excessive Surface Details
Not every object needs heavy scratches, dirt or damage. Surface details should match the object's age, use and design.
4. Confusing Roughness with Metallic
Roughness controls the spread of reflections, while metallic defines metallic behaviour in a metallic-roughness material workflow. They are not interchangeable settings.
5. Ignoring Texture Scale
A wood grain, fabric weave or concrete pattern should have a believable scale relative to the model. Incorrect scale can make an otherwise good material look artificial.
6. Testing Only Under One Light
Materials may look very different under different lighting conditions. Preview them in more than one setup before considering the work complete.
7. Forgetting the Target Platform
A film asset and a real-time game asset may have different texture-resolution, memory and material requirements. Always understand where the asset will be used.
3D Texturing for Animation, VFX and Game Art: What Is Different?
The fundamental texturing skills overlap, but production requirements can vary.
| Area | Main texturing consideration |
|---|---|
| Animation | Materials should support the character or environment design and remain consistent across shots |
| Film and VFX | Surface appearance should integrate with the scene, lighting and rendered footage |
| Game art | Texture quality must be balanced with real-time performance and memory requirements |
| Product visualisation | Materials should communicate the product's finish, colour and physical appearance |
| Architectural visualisation | Materials should represent building surfaces and interior finishes convincingly |
Students should choose practice projects based on the type of 3D work they want to explore. A game-art portfolio, for example, should demonstrate awareness of real-time asset requirements rather than only high-quality offline renders.
Who Should Consider a 3D Texturing Course in Hyderabad?
3D texturing may be worth exploring if you:
- Have completed Class 12 and want to explore 3D creative education.
- Are a graduate interested in animation, VFX or gaming.
- Enjoy digital art, materials, colour and surface details.
- Are learning 3D modelling and want to develop asset-creation skills.
- Want to explore character, prop or environment texturing.
- Are a working creative professional considering a 3D specialisation.
- Want to understand how 3D assets are prepared for animation or real-time production.
You do not need to be an expert artist before starting. However, observation, patience, an interest in visual detail and a willingness to practise are useful qualities.
How to Choose the Right 3D Texturing Course in Hyderabad
Before enrolling, evaluate the actual curriculum rather than choosing a programme based only on its title.
1. Check Whether the Course Covers the Complete Workflow
Ask whether the training includes:
- 3D asset preparation.
- UV mapping and UV layout.
- Texture painting.
- Material creation.
- PBR fundamentals.
- Texture baking.
- Texture export.
- Lighting and material preview.
- Asset presentation and portfolio development.
Not every programme will cover all these areas in the same depth. Ask for the module-wise curriculum.
2. Ask Which Software Is Taught
Confirm the exact applications and versions used for modelling, UV preparation, texturing, material creation and rendering.
Ask whether students get practical time with the software rather than only watching demonstrations.
3. Review Practical Projects
Ask what kinds of assets students will texture. A useful learning path should provide opportunities to work with different materials and asset types.
4. Understand the Portfolio Expectations
Ask whether you will complete projects such as a textured prop, character material study or environment material set. Find out whether the work includes UV layouts and texture-map breakdowns.
5. Confirm the Course Details
Before admission, verify:
- Whether a dedicated 3D texturing module or programme is currently available.
- The official programme name.
- Course duration and schedule.
- Eligibility requirements.
- Fees and payment terms.
- Software access.
- Practical project arrangements.
- Assessment and portfolio guidance.
- Any career guidance or placement assistance and its actual scope.
Do not rely on assumed course details. Request the latest information directly from the centre.
Explore 3D and VFX Training at Frameboxx Himayatnagar, Hyderabad
If you are searching for a 3D texturing course in Hyderabad, it is worth understanding how texturing connects with modelling, UV mapping, materials, lighting and rendering before selecting a programme.
Frameboxx Himayatnagar offers education in Animation, VFX and Digital Design. Students interested in 3D texturing can contact the centre to enquire about current training options and confirm whether the available curriculum covers UV mapping, texture painting, PBR materials, asset texturing and related practical exercises.
Before making an admission decision, request the current course structure and confirm the software, duration, fees, eligibility and portfolio expectations.
Explore the Frameboxx Himayatnagar website or course information portal.
Your next step: Speak with the centre and explain whether your interest is in character texturing, game assets, environment materials or general 3D production. This will help you ask more relevant questions about the available learning pathway.
Start Building Your 3D Texturing Skills
3D texturing is an essential part of creating complete 3D assets. It connects UV mapping, texture painting, PBR materials, surface detailing and lighting to give models their final appearance.
If you want to explore 3D texturing training in Hyderabad, focus on the actual workflow, software practice, quality of projects and portfolio development. Contact Frameboxx Himayatnagar to confirm the current training options and find out whether the available programme matches your learning goals.